Prima.Law’s Package Assembly feature lets you gather all your Forms, Addendums, and Supporting Documents to easily generate a PDF with a table of contents, page numbers and exhibit divider sheets.
Prima.Law’s Package Assembly feature allows you to save hours of time on each case. We know that many times, once you have gathered all the information, filled out the forms, prepared the exhibits, there is still the onerous task of physically assembling all these things into one package that you will also need to paginate and generate a table of contents for. This is now automated in Prima.Law.
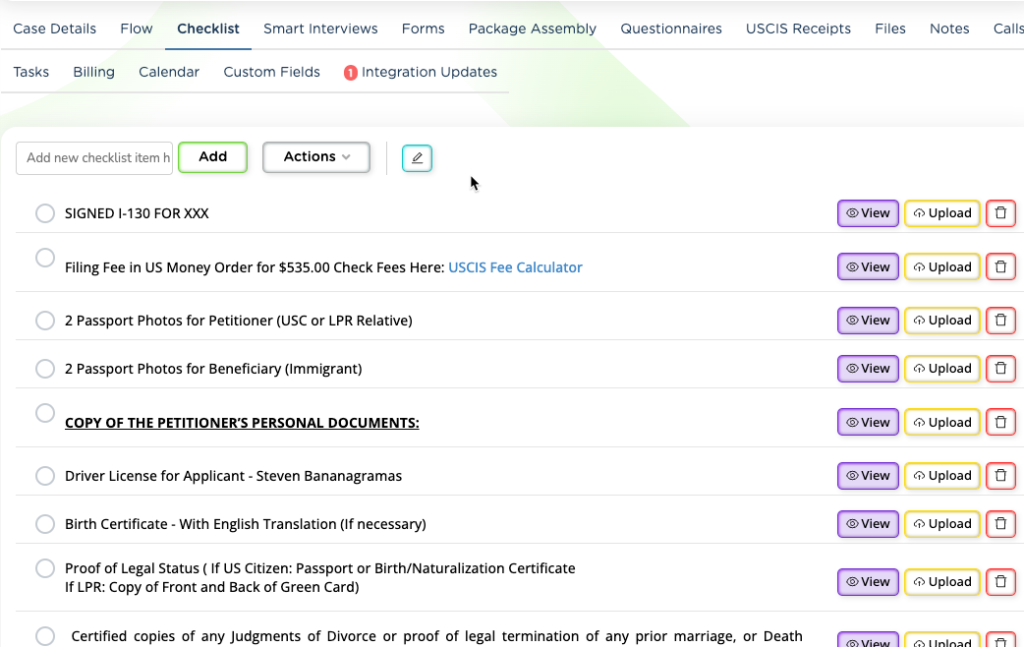
Checklist items that have a document uploaded to them will be visible in the “package assembly” interface. In Prima.Law cases we have checklists as shown here:
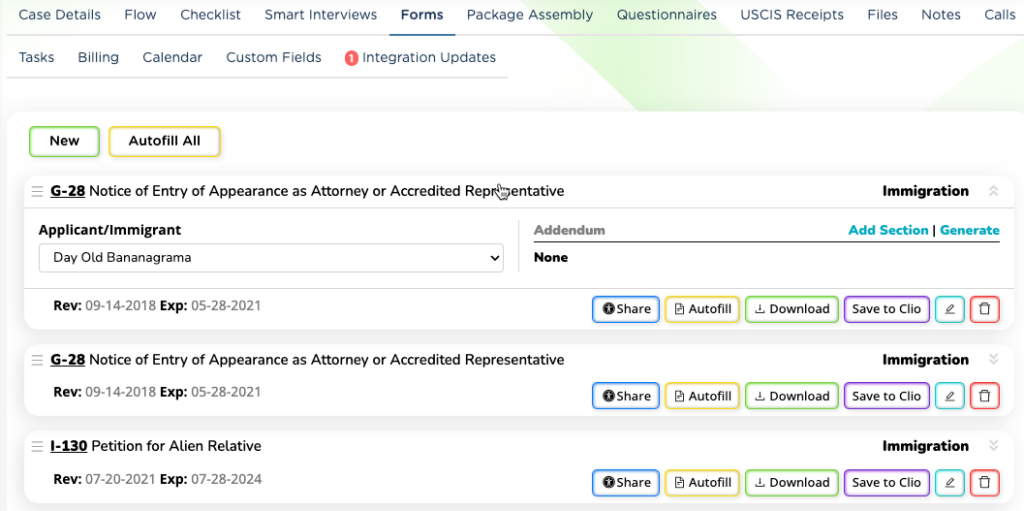
Forms that you created in the same case are visible in the “package assembly” tool.
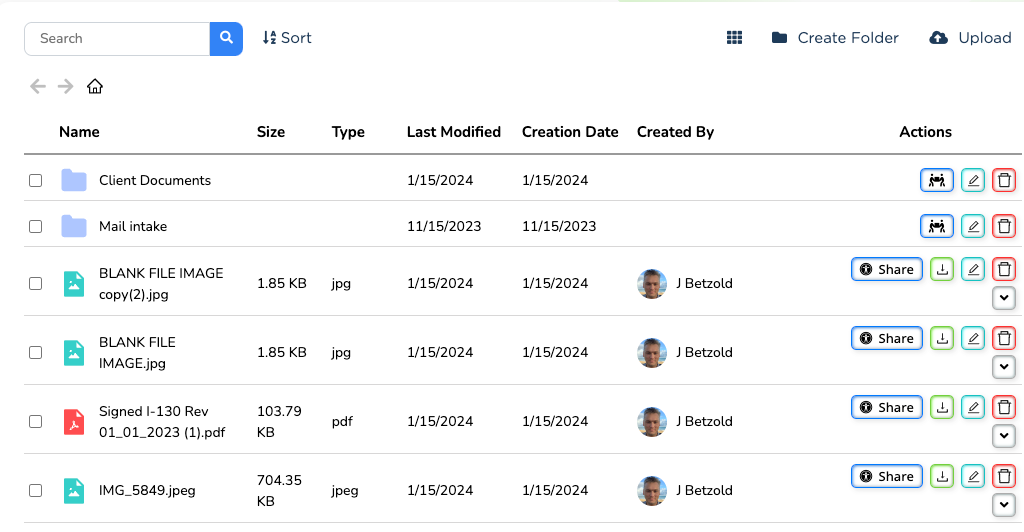
Each case has a Files tab as well. We can also use these in package assembly.
“Files” tab items that are supported file types (.pdf, .jpg, .png) will be visible in the “Documents” section of the “package assembly” interface.
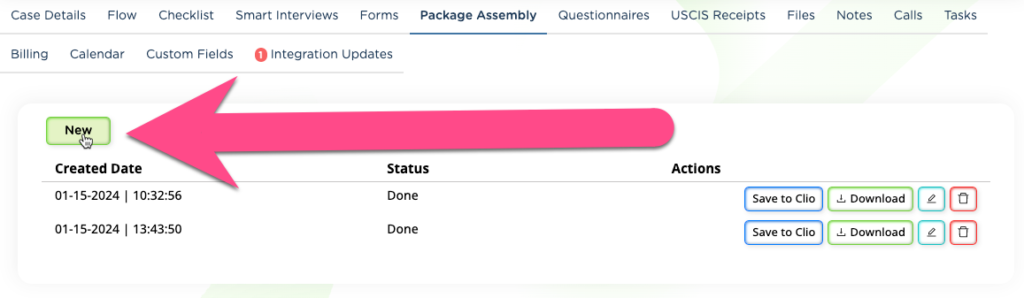
Navigate to the package assembly tab in your case and click new. This assumes you already uploaded all your documents and filled the forms.
In the left-hand column you will see the categories of items you can include. This includes forms, checklist items, documents and notes. Use the arrow to transfer items, or groups of items to the package.
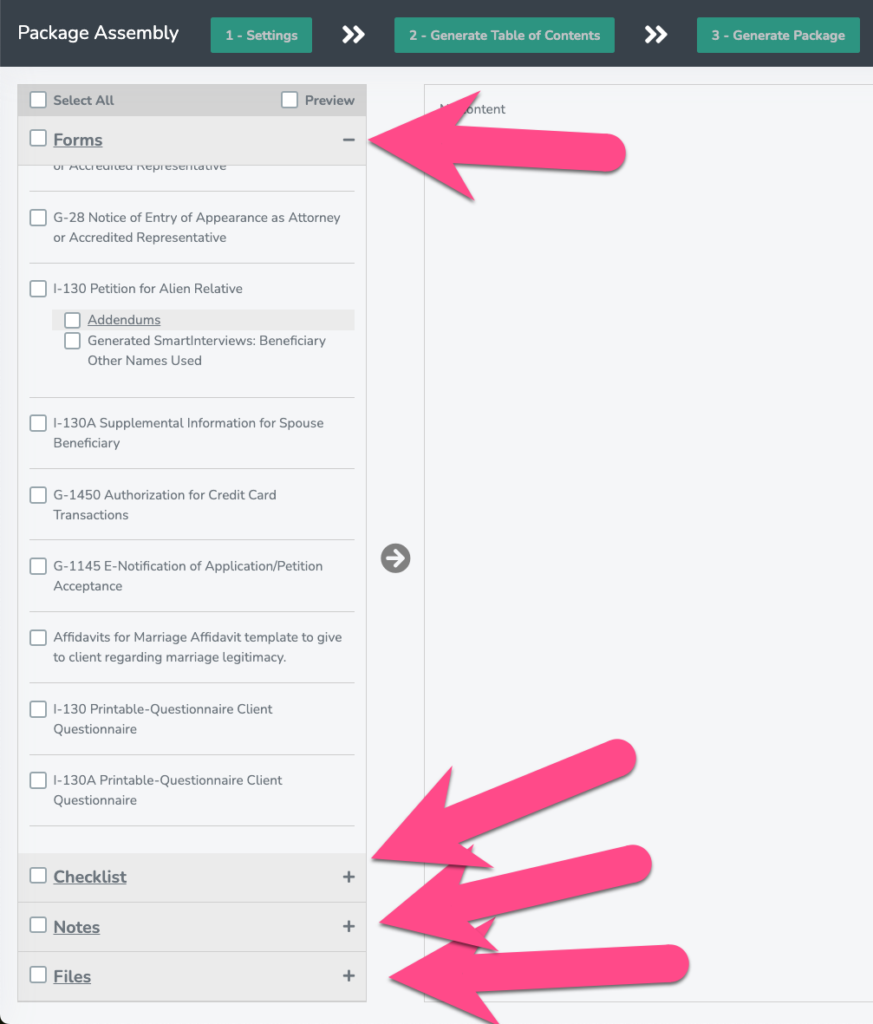
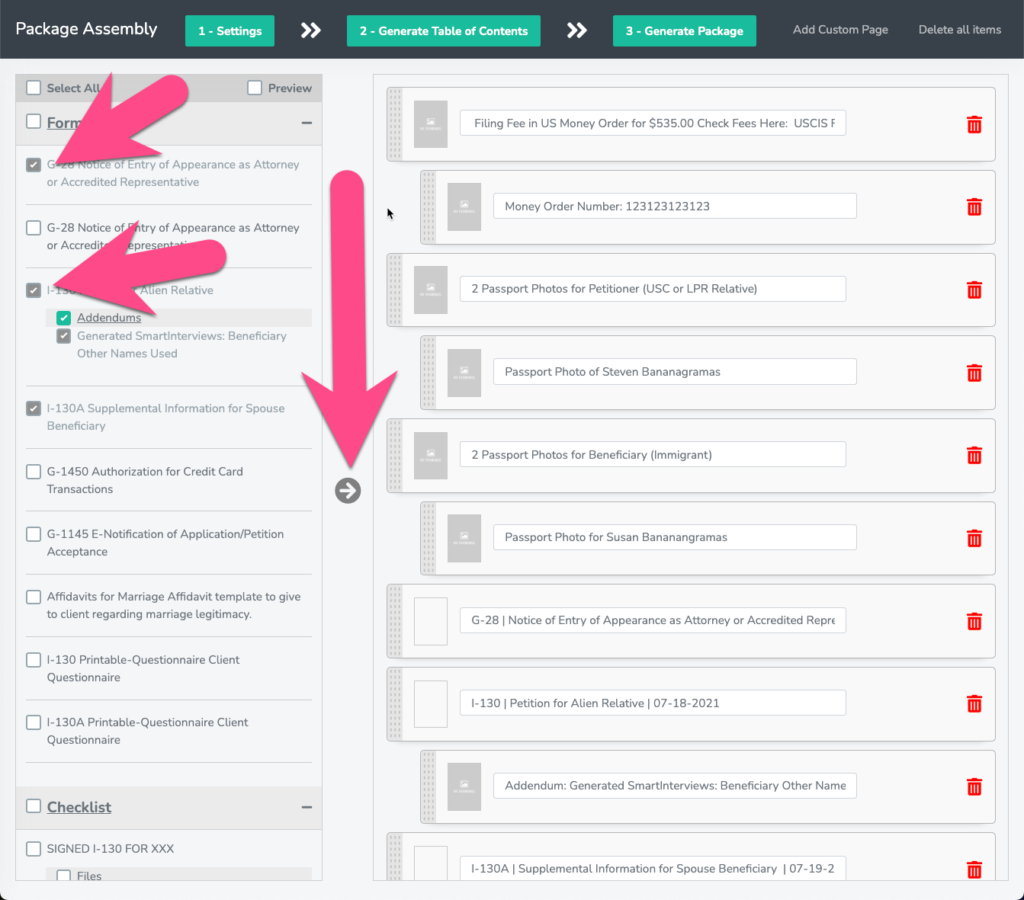
There is 1-level of indenting supported in the package. Any item that you indent as a “sub-item” will be grouped in the table of contents with the primary item.
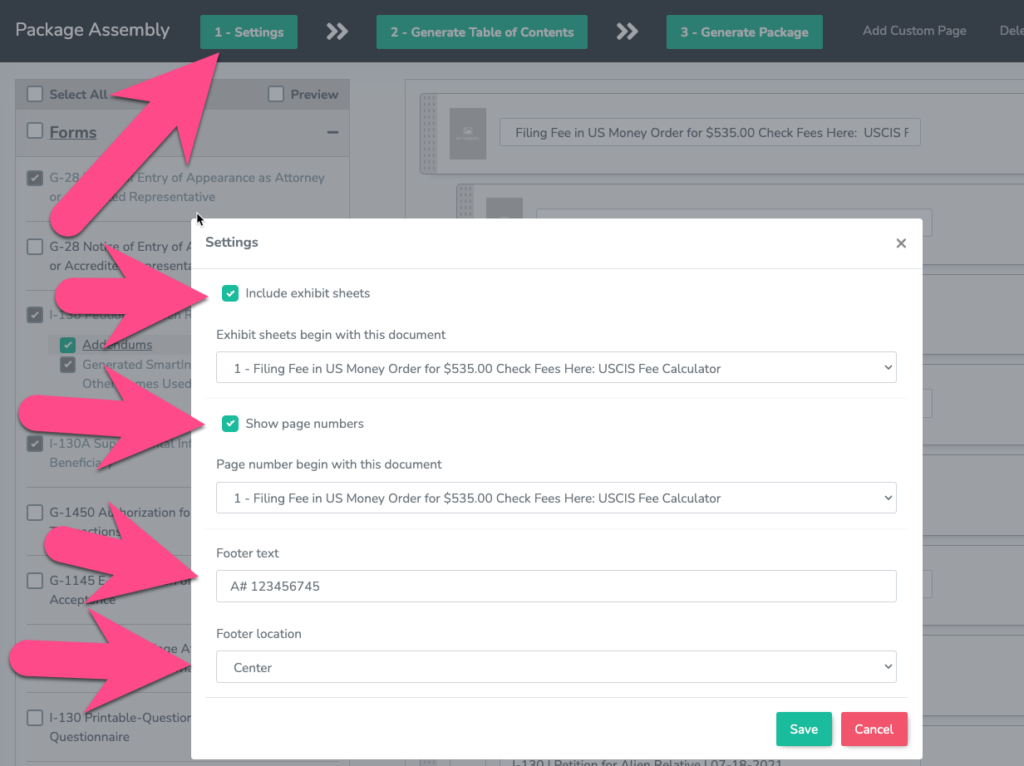
Navigate to the Settings to define how the package should be assembled. For USCIS Packages it is recommended to include Exhibit Sheets for the convenience of the attorney in reviewing the package before filing and for subsequent rapid reference to key evidence. Page numbers are typically required for larger EOIR (Immigration Court Petitions). You may also include footer text and location.
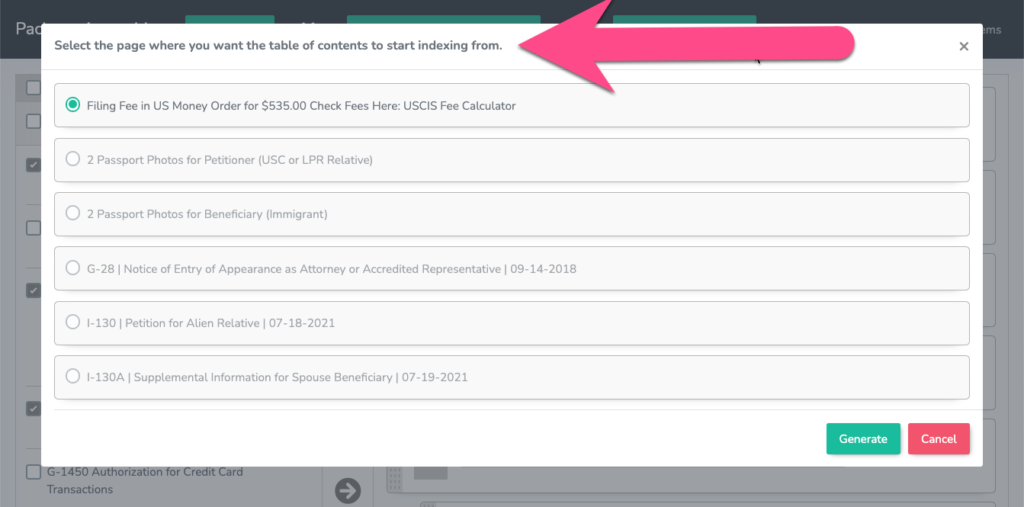
When you click on “Generate Table of Contents” you will need to choose where you want the indexing to begin. Page numbers will be applied at that document, and the table of contents will include the item and those below it.
Once generated, you can click “edit” and view the table that was generated for you, complete with page numbers.
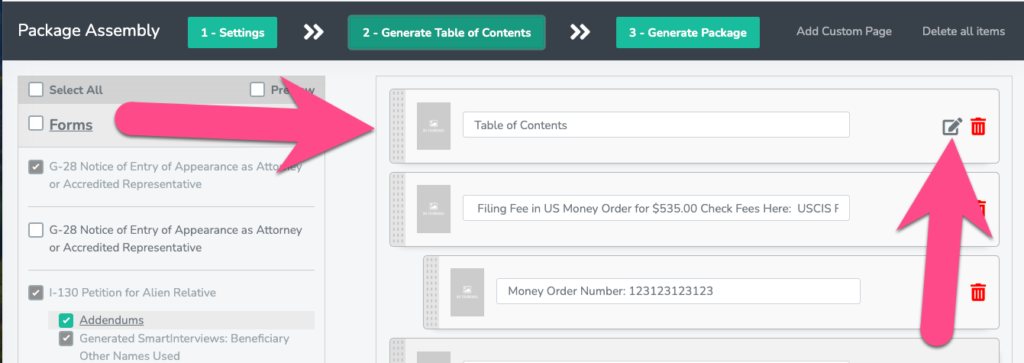
Edit the Table of contents and add your firm’s letterhead image (copy and paste from a Google Doc to import the image). You should also use this page as the cover page for the filing.


When ready to compile it all in one .pdf, click Generate.

Then you will have to wait between 30-60 seconds for the pdf to render. You will receive an email at your firm’s “notification email” which is set in the administrator panel.
NEW!
As part of our 3.0 Update, Prima.Law now shows the progress of the Package creation, no need to keep refreshing!


