As with many other email applications that connect with Zapier, you can connect your email account to Prima.Law to accept and file away incoming emails.
Here are some important pointers to make sure you have your Email integration working well. For this example we will be using a Gmail account. Suppose this is the general email account used for incoming mail to your law firm. You can also create other zaps with other gmail accounts if you have multiple email accounts where you receive incoming mail to your firm for client cases.
First, this example assumes that the sender (your client) has an email address that is part of their contact profile in Prima.Law. There must be an exact match.
You will start with the Gmail Action of Receiving an Email. There are many options for only handling certain emails, but for our purposes we will look at the “Sent From” email address and see if it matches a contact in your Prima.Law account.
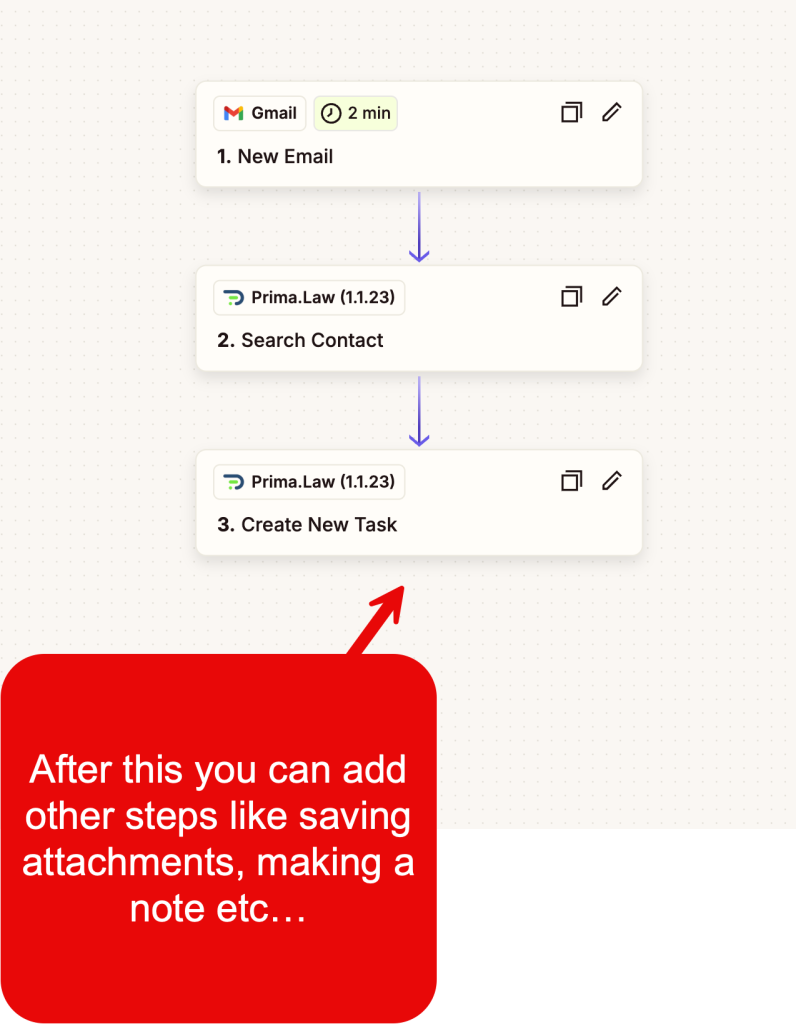
Assuming it finds a match from the “Search” step, the flow moves on and you can establish steps to:
- Create a Note
- Create a Task
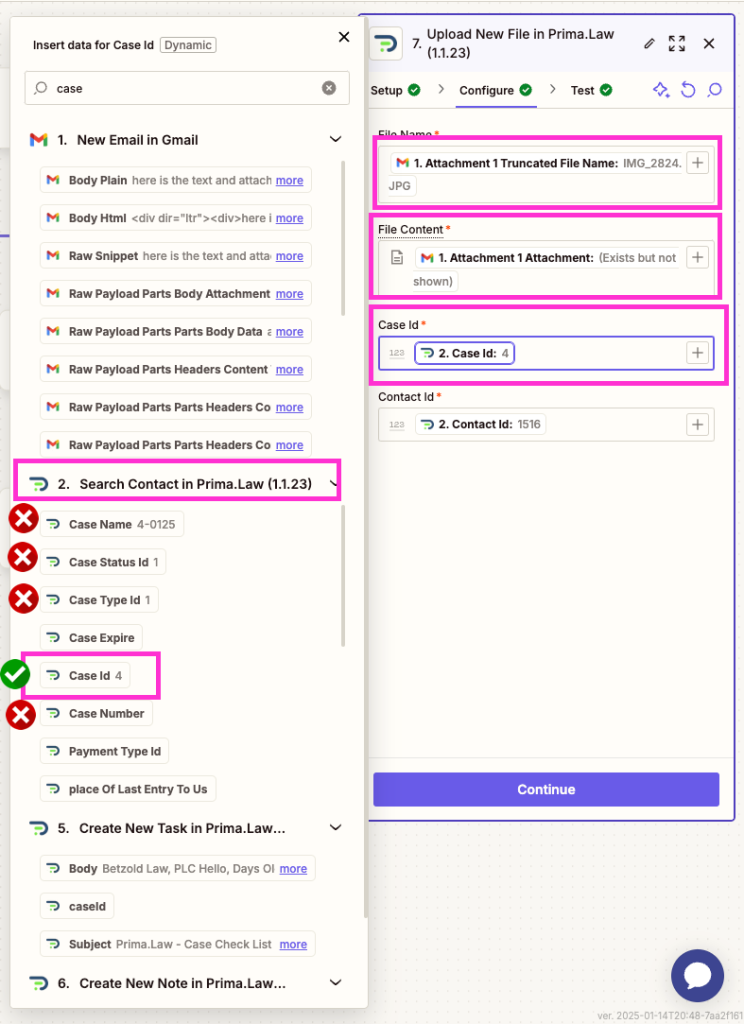
- Save a File (if there is an attachment), or
- Trigger an action in another app
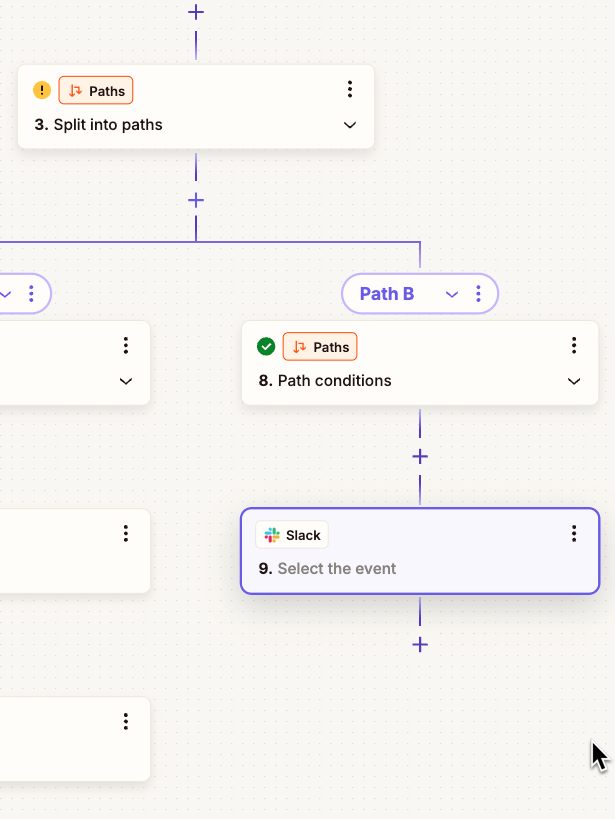
Additionally, you can setup your “Zap” with a flow so that you can route emails where there is no match for an email in your Prima.Law account. You can have it sent to a general contact and a task for a staff to find it, or you can use Zapier to send a message via Slack, Discord, SMS or Email to someone to handle that particular email that has no match in Prima.Law so you can be sure all incoming mail is attended.
In this image you can see how a “Path” is created. If a contact is found in Prima.Law for the email address, the workflow goes down path A. Otherwise, Path B.
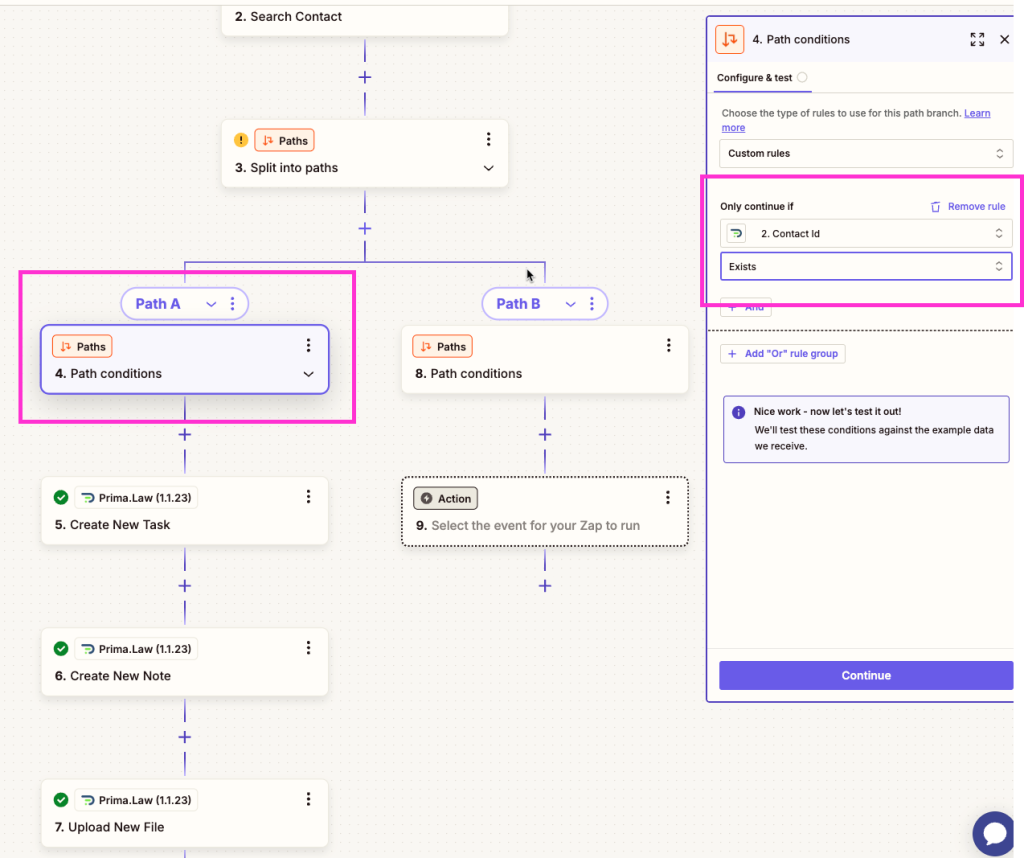
Path B could be used to notify a team member that there is an email that could not be automatically filed to a client’s case and it needs attention.
Important Notes
In this workflow, you can save a file to the files tab in Prima.Law. You can only save a file if you have an open case for the contact. One of the options that appears is a “case ID” for the contact. This will be the most recent open case that the contact has. Use this.
Be sure to test as you go for each step and correct any errors. Remember to follow these instructions carefully.