How does autofilling a form work?

Autofilling Forms in Prima.Law

Step-by-Step Guide

  • 1. Creating a Contact Profile
    • Access the Contact Page: Create a contact for any new or potential client.
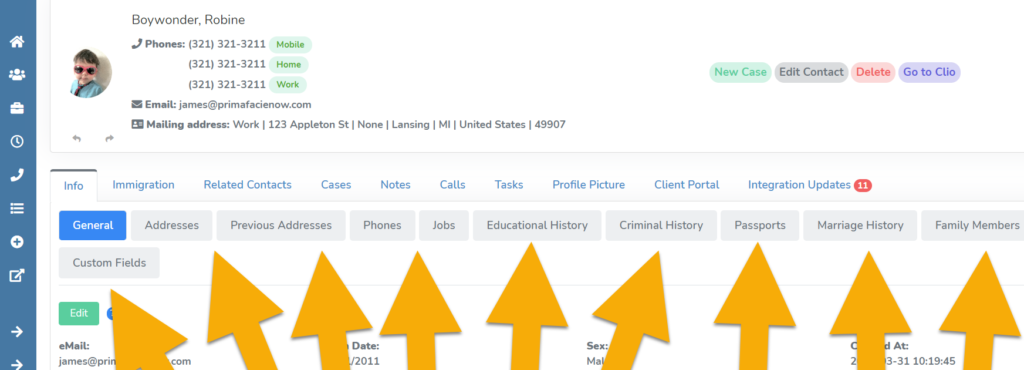
    • Enter Basic Information: Fill in general information such as name, address, phone number, city, and place of birth.
    • Biographic Information: Include details like hair color, eye color, race, and ethnicity, as required by immigration and FBI forms.
  • 2. Entering Specific Information
    • Passports: Add passport information by clicking the “Add” button, filling out the popup form, and saving it.
    • Marriage and Employment History: Similarly, add details for marriage history, employment history, and phone numbers. Specify which phone number is the primary contact.
  • 3. Using the Contact Profile Database
    • Centralized Data Storage: Store all client data in the contact profile. This data will be used to populate various forms.
    • Manual Data Entry: Enter data manually into the contact profile.
  • 4. Importing Data Using Smart Interviews
    • Send Smart Interviews: Issue smart interviews to clients to collect data online.
    • Data Import: Once the client completes the smart interview, the data is imported into the contact profile, ready to be used in forms.
  • 5. Autofilling Forms
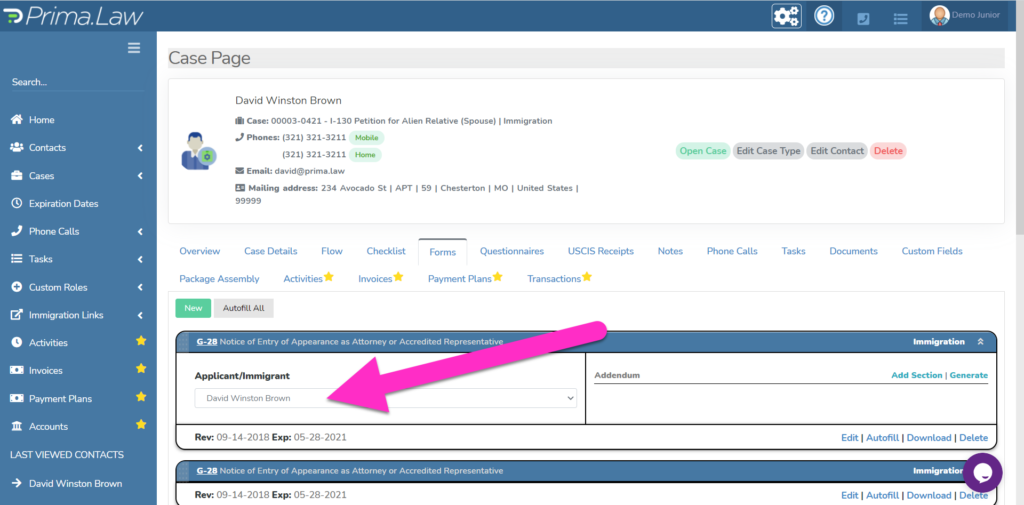
    • Access the Forms: Go to the forms section and select the form you want to autofill.
    • Select the Client: Choose the client whose data you want to autofill. This will overwrite any existing form-specific data with the data from the contact profile.
    • Edit Autofilled Data: Review and edit the autofilled form as necessary. Make sure the client’s information is accurate.
  • 6. Handling Attorney Information
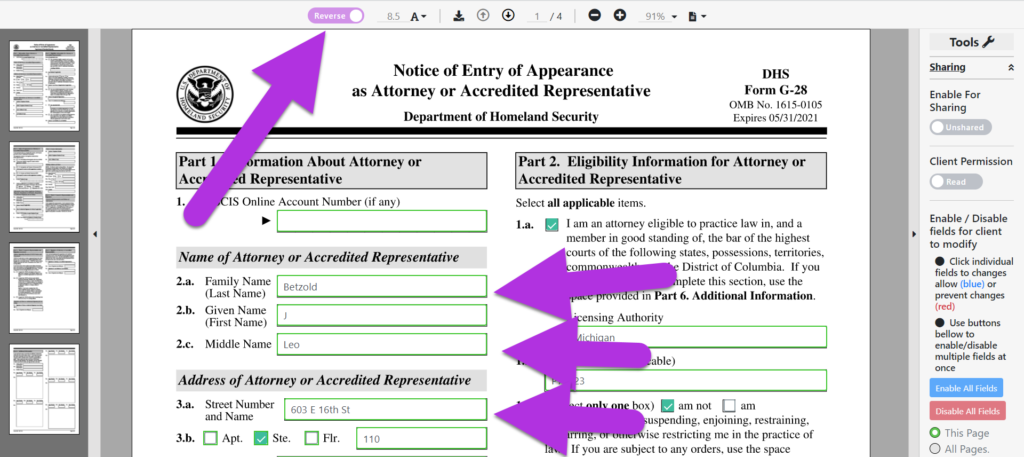
    • Assigning Attorneys: Ensure the correct attorney’s details are on the case details page.
    • Autofilling Attorney Information: Select the attorney to autofill their information into the form. Save changes to the case details page before autofilling forms again.
  • 7. Using Reverse Autofill
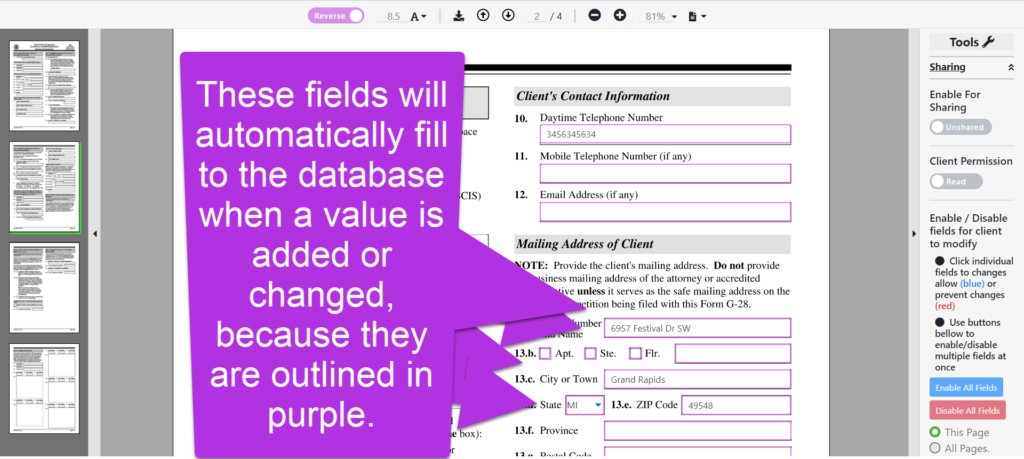
    • Editing Client Information on Forms: Fields highlighted in green indicate that changes will update the contact profile.
    • Turn Off Reverse Autofill: If you don’t want changes to be saved back to the contact profile, turn off reverse autofill.
  • 8. Managing Multiple Cases
    • Handle Multiple Cases: Use the contact profile to manage information across multiple cases for a client.
    • Autofilling Forms for Different Clients: Select different clients and autofill their information into the appropriate forms.
  • 9. Handling Errors and Updates
    • Review and Authorize Data: After clients fill out smart interviews, review and authorize the data to ensure accuracy.
    • Updating Information: Update the contact profile with any new information and autofill forms again to reflect these changes.

Autofilling forms in Prima.Law simplifies the process of managing client data and ensuring that all forms are accurately completed. By following these steps, you can efficiently use Prima.Law’s autofill features to streamline your workflow and reduce manual data entry errors.

Last updated byDavid